Imagine trying to cut a razor-sharp, stress-free slot through a block of hardened tool steel or a delicate, intricate shape in a tungsten carbide die. A conventional end mill would shatter, and the heat from the process would ruin the material's properties. This is where Wire EDM (Electrical Discharge Machining) steps in, not as a replacement for traditional machining, but as a specialized scalpel for the toughest jobs.
Many shops that invest in this powerful technology still struggle with its nuances. Wire breakage halts production, inconsistent accuracy leads to costly rework, and balancing impeccable quality against tight deadlines and budgets feels like a constant gamble. The root of these issues often lies in a misunderstanding of the delicate interplay between machine parameters, material behavior, and practical shop floor economics.
By the end of this guide, you'll have a firm grasp on how to select the right process for the job, dial in optimal wire EDM parameters, diagnose and prevent wire breaks, control critical dimensions like kerf and taper, and make the informed trade-offs between accuracy, speed, and cost that directly impact your bottom line.
Wire EDM vs. CNC Milling: When to Choose Which
Choosing between Wire EDM and CNC milling isn't about which is "better," but which is the right tool for your specific part's geometry, material, and required precision. Each process has a distinct sweet spot.
Material Hardness & Machinability
This is the most decisive factor. Wire EDM cuts any conductive material regardless of hardness. It uses a series of controlled electrical sparks to erode material, so it doesn't matter if you're machining annealed steel, hardened D2 tool steel (HRC 60+), solid carbide, or exotic superalloys like Inconel. The process is non-contact, applying virtually no mechanical force.
Conversely, CNC milling requires cutting tools that are harder than the workpiece. Machining hardened steels above ~45 HRC becomes exponentially more difficult, requiring specialized (and expensive) carbide or ceramic tooling, slower speeds, and shallower cuts. For materials like tungsten carbide or fully hardened tool steels, milling is often impossible or economically unfeasible for anything beyond very light finishing passes. The milling heat affected zone can also be a concern, potentially altering the metallurgy of the part's surface.
Geometric Freedom & Limitations
Geometry dictates the feasible process. Wire EDM excels at sharp internal corners, narrow slots, and tall, thin sections. Since the "tool" is a thin wire (typically 0.1mm to 0.3mm), it can produce inside corners with radii equal to the wire radius plus the spark gap,far sharper than any end mill. It can also machine extremely fragile features without deflection because there's no cutting force.
CNC milling struggles with deep, narrow features and requires clear access for its rotating tools. Cutting a deep, small-diameter hole or a slot with a high depth-to-width ratio is challenging due to tool deflection, breakage, and poor chip evacuation. While 5-axis milling offers incredible freedom, it cannot produce true sharp internal corners; it will always leave a radius.
Key Decision Factors:
* Complex Profile Machining: For intricate 2D profiles, especially in hard materials, Wire EDM is often the only choice.
* Internal Features: If your part has internal pockets or holes that don't permit a tool holder to enter, Wire EDM's ability to start from a pre-drilled hole is a major advantage.
* Surface Finish: Milling can achieve a wide range of finishes. EDM surfaces have a characteristic matte, spark-eroded texture. A fine wire EDM finish can be very good, but for optical-grade surfaces, milling or grinding is usually required.
* Economics: For simple shapes in soft materials, milling is almost always faster and cheaper. For complex, hard parts, the high tooling costs and slow speeds of milling make wire EDM the more economical choice. A smart hybrid machining strategy is common: use milling to rough out the part quickly from a soft state, then harden it, and use Wire EDM for the final, precise geometry.
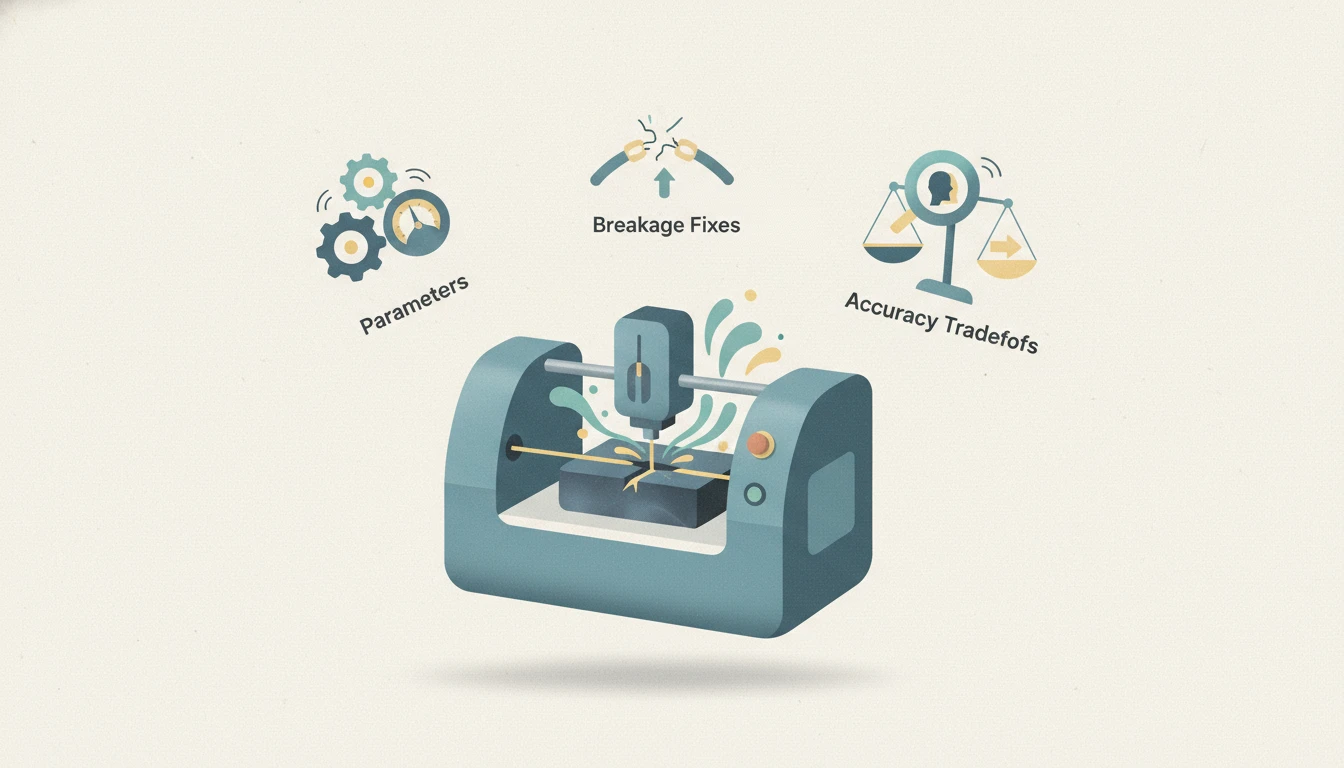
Wire EDM Parameters Chart: The Key Variables
Running a Wire EDM machine isn't about pressing "start"; it's about orchestrating a symphony of electrical and mechanical settings. Getting this right is the difference between a profitable, high-quality cut and a spool of broken wire and scrapped parts.
Decoding Electrical Parameters
The spark is where the magic happens, and you control it with precision.
* Pulse On-Time (Ton): This is the duration of each spark. Longer on-time increases the energy per spark, boosting cut speed but creating a larger crater and rougher surface finish. Pushing it too high is a primary cause of wire breakage, as it overheats the wire.
* Pulse Off-Time (Toff): The pause between sparks. This critical period allows the dielectric fluid to flush away eroded particles and deionize the spark gap. Shorter off-time increases cutting speed but risks instability if the gap isn't cleared, leading to concentrated arcing and wire breaks.
* Peak Current (IP): The amperage during the on-time. Higher current means more aggressive cutting. It's typically adjusted in tandem with on-time.
Think of it like a hammer: On-time is how long the hammer is in contact, peak current is how hard you swing, and off-time is how long you wait between swings to clear the debris.
Wire Selection & Mechanical Settings
The wire is your consumable electrode, and its characteristics are crucial.
* Wire Type: Standard brass wire is economical and general-purpose. Coated wires (e.g., zinc-diffused or stratified) offer significant advantages. The coating vaporizes at a lower temperature than the brass core, creating a more powerful plasma bubble that improves flushing and can increase wire EDM cutting speed by 30-50% in hard, thick materials.
* Wire Diameter: Thicker wires (0.25mm+) are stronger and allow for higher flushing pressures and faster roughing. Thinner wires (0.1mm) are for fine details and smaller corner radii but are more prone to breakage.
* Wire Tension: Higher tension keeps the wire straighter, improving accuracy, especially on tall workpieces. However, excessive tension on a thin wire undergoing thermal stress is a recipe for snap-offs.
* Wire Feed Speed: The wire must constantly move to present a fresh, unworn section to the spark gap. Too slow, and you erode one spot until it breaks. Too fast, and you waste wire and can induce vibration.
Dielectric Fluid (usually deionized water) is not just a coolant. Its resistivity (conductivity) is critical. Too pure (high resistivity), and initiating sparks is difficult. Too conductive (low resistivity), and you get uncontrolled stray sparks that erode the workpiece and wire indiscriminately. Constant filtration and deionization are mandatory for precision EDM and surface finish Ra control.
Sample Parameter Table for Common Materials (for a 0.25mm Brass Wire):
| Material | Approx. Cutting Speed (mm²/min) | Typical On-Time (µs) | Typical Off-Time (µs) | Key Consideration |
|---|---|---|---|---|
| Tool Steel (Hardened) | 120-180 | 6-12 | 20-30 | Stable cutting; use coated wire for speed. |
| Tungsten Carbide | 60-100 | 4-8 | 30-40 | Very slow, prone to cracking; use multiple skim passes. |
| Inconel 718 | 80-120 | 5-10 | 25-35 | Produces viscous, difficult-to-flush debris. |
| Aluminum | 250+ | 10-20 | 15-25 | Fast but messy; oxide layer can cause instability. |
Fine-tuning: Start with the machine manufacturer's recommended parameters for your material and thickness. For a finer finish, reduce the on-time and peak current and add a final low-power "skim" pass. For maximum speed in a roughing cut, increase these values while carefully monitoring spark stability.
Wire Breakage in Wire EDM: Causes and Troubleshooting
A wire break is more than an annoyance; it's lost time, wasted wire, and a potential part scrapper. Proactive troubleshooting is essential. The top five reasons are: flushing failures, parameter mismatch, poor wire quality, material inclusions, and mechanical misalignment.
Flushing Failures
The dielectric fluid's job is to cool the wire and blast away microscopic debris from the spark gap. When flushing problems in wire EDM occur, debris accumulates. This creates a "shortcut" for electricity, causing secondary discharges away from the cutting front. These erratic sparks over-erode a section of the wire, thinning it until it snaps under tension.
Diagnosis & Action:
1. Check Nozzle Alignment: The upper and lower nozzles must be perfectly aligned with each other and centered on the wire. Misalignment creates a turbulent, ineffective fluid jet. Re-align using the machine's calibration procedure.
2. Inspect Pressure & Flow: For jet flushing, ensure pressure is adequate for the material thickness (higher for thicker parts). For submerged cutting, ensure the tank is properly filled and flow through the work zone is visible.
3. Examine Filters: A clogged filter reduces flow. Check and clean or replace filters as part of routine preventive maintenance.
Parameter Instability
Pushing the machine too hard for the conditions is a direct path to a break. Excessive pulse energy (high on-time/current) overheats the wire, reducing its tensile strength. Insufficient off-time doesn't allow the gap to clear, leading to concentrated arcing in one spot.
Diagnosis & Action:
1. Listen and Look: A stable cut has a consistent, crisp sizzling sound. Unstable cutting sounds erratic, with pops and sputters. Visually, the spark stream should be steady and blue-white.
2. Use Adaptive Control: Modern machines have adaptive EDM control systems that monitor spark frequency and voltage, automatically adjusting feed rate to maintain a gap. Ensure it's activated.
3. Step Back Parameters: If breaks occur, systematically reduce on-time and peak current, and increase off-time. It's better to cut slower than not at all. Refer to your wire EDM parameters chart as a baseline.
Systematic Approach: Start with the mechanical: verify wire guides are clean and not grooved, check power contacts for wear, and ensure the wire spool feeds smoothly. Then move to process: verify parameters and flushing. Finally, consider the material,non-conductive inclusions in the workpiece (like carbides in steel) can cause sudden, unexplained breaks.
Kerf Width and Taper Control: Achieving Precision
In wire EDM, you're not cutting a line of zero width. Understanding and controlling the cut's geometry,its width (kerf) and its wall angle (taper),is fundamental to hitting tight tolerances.
Kerf Width Basics
The kerf is the width of the material removed by the cut. It is not just the wire diameter. The formula is:
Kerf = Wire Diameter + (2 x Spark Gap)
The spark gap is the tiny distance between the wire and the workpiece where the discharge occurs. This gap varies with power settings,higher energy creates a larger gap. Therefore, your kerf changes if you change parameters between roughing and finishing. Kerf inconsistency is a major source of dimensional error.
Actionable Strategy: Never assume the kerf. Calibrate it. Regularly perform a test cut on a scrap piece of the same material and thickness you'll be using. Measure the actual slot width. Use this measured value in your CNC program's kerf compensation (offset) value. This tells the machine to path the wire centerline slightly away from the part profile to account for the precise kerf.
Taper Angle Mechanics
Wire EDM can cut tapered walls, which is invaluable for making punch and die sets with clearance angles. Taper is achieved by moving the upper wire guide in the X and Y axes independently from the lower guide, effectively tilting the wire.
The mechanics are simple, but the execution requires care:
* Large taper angles (e.g., >15° per side) can cause the wire to "bow" or deflect due to uneven flushing and spark forces, reducing accuracy and potentially causing wire breaks.
* The maximum achievable taper is limited by the machine's guide separation and the workpiece thickness.
* Modern CNC controls include automatic taper compensation tables that adjust the programmed path in real-time to produce the desired angle on the workpiece, not just at the guides.
For Precision: When cutting with taper, flushing becomes even more critical. The dielectric must flow evenly through a varying gap. Submerged wire EDM is often the best method for tapered cuts to ensure uniform cooling. Always validate the final taper angle with a coordinate measuring machine (CMM) or optical comparator on a first-article part.
Flushing Problems in Wire EDM: Solutions for Consistent Cuts
Effective flushing is the unsung hero of a successful wire EDM operation. When it fails, every other parameter becomes irrelevant.
Diagnosing Flushing-Related Defects
You can often diagnose flushing issues by observing the symptoms:
* Irregular Spark Pattern: The spark stream is not uniform; it dances or localizes.
* Burned Wire Ends: After a break, the wire tip is discolored (blue/black) and melted, indicating extreme, localized heat from poor cooling.
* Discolored Cut Surface: Streaks, banding, or a dark, carbonized appearance on the cut surface show where debris was not evacuated and re-solidified or caused secondary discharges.
* Erratic Cutting: The machine's servo system constantly hunts forward and backward, unable to maintain a stable spark gap due to debris interference.
Optimizing Flushing Parameters
Optimization is both an art and a science.
1. Nozzle Positioning: For jet flushing, the nozzle should be as close to the workpiece as possible without causing a short (typically 0.5-1.0mm). This creates a high-velocity stream directed precisely into the gap.
2. Pressure & Flow Rate: Increase pressure for thicker materials to force fluid through the longer cut channel. Monitor the machine's pressure gauges and flow meters.
3. Submerged vs. Jet: Submerged wire EDM (where the part is fully underwater) provides the most uniform cooling and is excellent for tall parts, tapers, and intricate geometries. Jet flushing is simpler but can struggle with deep cuts.
4. Fluid Maintenance: This is non-negotiable. Monitor fluid conductivity/resistivity daily. High conductivity causes instability. Maintain the EDM filter system. Dirty fluid is a primary cause of all flushing-related problems. Change filters and resin tanks as recommended.
Advanced Tactic: For extremely challenging cuts (e.g., small holes with poor flush-through), some shops use high-pressure flushing systems (>100 bar) or even pause the cut periodically to allow debris to settle before resuming.
Accuracy vs. Cost Tradeoffs in Wire EDM: Making Smart Decisions
Every decision on the wire EDM shop floor involves a balance between the ideal and the economical. Understanding these trade-offs is what separates a profitable shop from a struggling one.
Speed vs. Finish: The Economic Equation
This is the most fundamental trade-off. A roughing pass with high pulse energy cuts quickly but leaves a rough, pitted surface (e.g., Ra 3.2 µm). Adding one or two lower-energy finishing ("skim") passes dramatically improves the surface finish Ra (down to Ra 0.4 µm or better) but can double or triple the total cycle time.
The Smart Decision: You must calculate the total cost per part. Does the part need a mirror finish? If a rougher finish from a single pass is functionally acceptable, the saved machine time is pure profit. If a fine finish is required, skipping secondary operations like hand polishing may justify the extra EDM time. Always ask: "What is the functional requirement?"
Wire Cost Optimization
It's easy to focus on the price per kilo of wire, but this is a trap. A more expensive coated wire might cost 20% more per spool, but if it cuts 40% faster in your hard steel jobs, you win.
* Direct Costs: Wire, dielectric fluid, electricity, filters.
* The Big Cost Driver: Machine time + labor + overhead. This is your wire EDM cost per hour. Reducing cycle time saves far more money than saving on wire.
Practical Example for Quoting: You have a hardened steel stamping die block.
* Option A (Brass Wire): Cut time: 10 hours. Wire cost: $50. Machine cost (@$100/hr): $1000. Total: $1050.
* Option B (Coated Wire): Cut time: 6 hours (40% faster). Wire cost: $70. Machine cost: $600. Total: $670.
The coated wire saves $380 per part, despite its higher unit cost. This is the kind of precision machining ROI analysis needed for smart wire EDM quoting.
Final Strategy: Work with your customer or design team to define realistic tolerances. Holding ±0.005mm is exponentially more expensive and time-consuming than ±0.02mm. Often, the more forgiving tolerance is perfectly functional. Your job is to provide the data that informs that decision.
Mastering wire EDM is not about finding a single "perfect" setting. It's about developing a deep understanding of how parameters interact, learning to troubleshoot systemically, and constantly evaluating the trade-offs between speed, precision, and cost. Each of these decisions,from wire selection to the number of skim passes,has a direct and measurable impact on your shop’s workflow and profitability.
Written with LLaMaRush ❤️